Integrating Google Gemini AI into Project Frostbyte
Introduction
For my project, I integrated Google’s Gemini AI into our social media website. This chatbot is designed to provide expert camping advice, acting as a knowledgeable guide for campers. The AI is fine-tuned with instructions to keep responses helpful and relevant to outdoor survival.
This blog covers the Frontend, Backend, and Table.
Setting Up Google Gemini AI
To use Gemini AI, I went into Google AI for Developers. Then, I created a new google account and created an API key. In order to secure this key, I inserted it into my .env file. I configured the API with google.generativeai and loaded my API key securely.
```python
import os
import google.generativeai as genai
from dotenv import load_dotenv
load_dotenv()
genai.configure(api_key=os.getenv(“API_KEY”)) </code>
Instructions based on Frostbyte’s Camping Theme
To comply with our project, I provided the AI system instruction to shape its personality and responses in the backend API.
system_instruction = (
    "You are an AI expert specializing in camping advice. You have the knowledge of park rangers and survival specialists. "
    "You provide expert guidance on camping gear, survival skills, and safety tips. "
    "Keep responses under 4 sentences, concise, and easy to understand."
)
model = genai.GenerativeModel( model_name=”gemini-1.5-flash”, system_instruction=system_instruction ) </code>
Actual Backend CRUD functions
I used the Flask Blueprint model and referenced other code in the backend to write my own:
class Chatbot(Resource):
    def __init__(self):
        self.history = []
        self.chat_session = model.start_chat(history=self.history)
def generate_ai_response(self, user_input):
    """Generates a response from Gemini AI."""
    try:
        response = self.chat_session.send_message(user_input)
        return response.text.rstrip("\n") if response.text else "Sorry, I couldn't process that."
    except Exception as e:
        print(f"Error generating AI response: {str(e)}")
        return "Sorry, I couldn't process that." </code>
This allowed me to generate responses from when I sent code from the frontend.
Frontend Code
After styling my chatbox in order to function like other social media apps, I wrote code so that I could fetch to my backend crud functions.
First, I declared the base url so that I could reference it in later sections of my code.
const API_BASE_URL = "http://127.0.0.1:8102/api";
This is my first section that connects with the post function of my backend.
async function sendMessage() {
        const input = document.querySelector('.chatbox-input input');
        const content = document.querySelector('.chatbox-content');
        const message = input.value.trim();
    if (message) {
        input.value = '';

        try {
            // Send message to backend using dynamic API base URL
            const response = await fetch(`${API_BASE_URL}/chatbot`, {
                method: 'POST',
                headers: {
                    'Content-Type': 'application/json',
                },
                body: JSON.stringify({ user_input: message }),
            }); </code>
This section allows the user to send messages that will communicate with my Gemini API and allows me to receive responses. I do the same and reference the delete and update functions of my API by using the correct endpoint.
 async function updateMessage(messageId) {
        const newText = prompt('Enter the updated message:');
        if (newText) {
            try {
                const response = await fetch(`${API_BASE_URL}/chatbot/update/${messageId}`, {
                    method: 'PUT',
                    headers: {
                        'Content-Type': 'application/json',
                    },
                    body: JSON.stringify({ new_text: newText }),
                });
            if (!response.ok) {
                throw new Error('Failed to update message: ' + response.statusText);
            }

            const messageElement = document.querySelector(`[data-message-id="${messageId}"]`);
            if (messageElement) {
                messageElement.textContent = newText;
            }
        } catch (error) {
            console.error('Error updating message:', error);
        }
    }
}

// Function to delete a message
async function deleteMessage(messageId) {
    try {
        const response = await fetch(`${API_BASE_URL}/chatbot/delete/${messageId}`, {
            method: 'DELETE',
        });

        if (!response.ok) {
            throw new Error('Failed to delete message: ' + response.statusText);
        }

        const messageElement = document.querySelector(`[data-message-id="${messageId}"]`);
        if (messageElement) {
            messageElement.remove();
        }
    } catch (error) {
        console.error('Error deleting message:', error);
    }
}

// Event listener for the send button
document.querySelector('.chatbox-input button').addEventListener('click', sendMessage);

// Event listener for the Enter key
document.querySelector('.chatbox-input input').addEventListener('keypress', function (e) {
    if (e.key === 'Enter') {
        sendMessage();
    }
}); </code>
Testing process
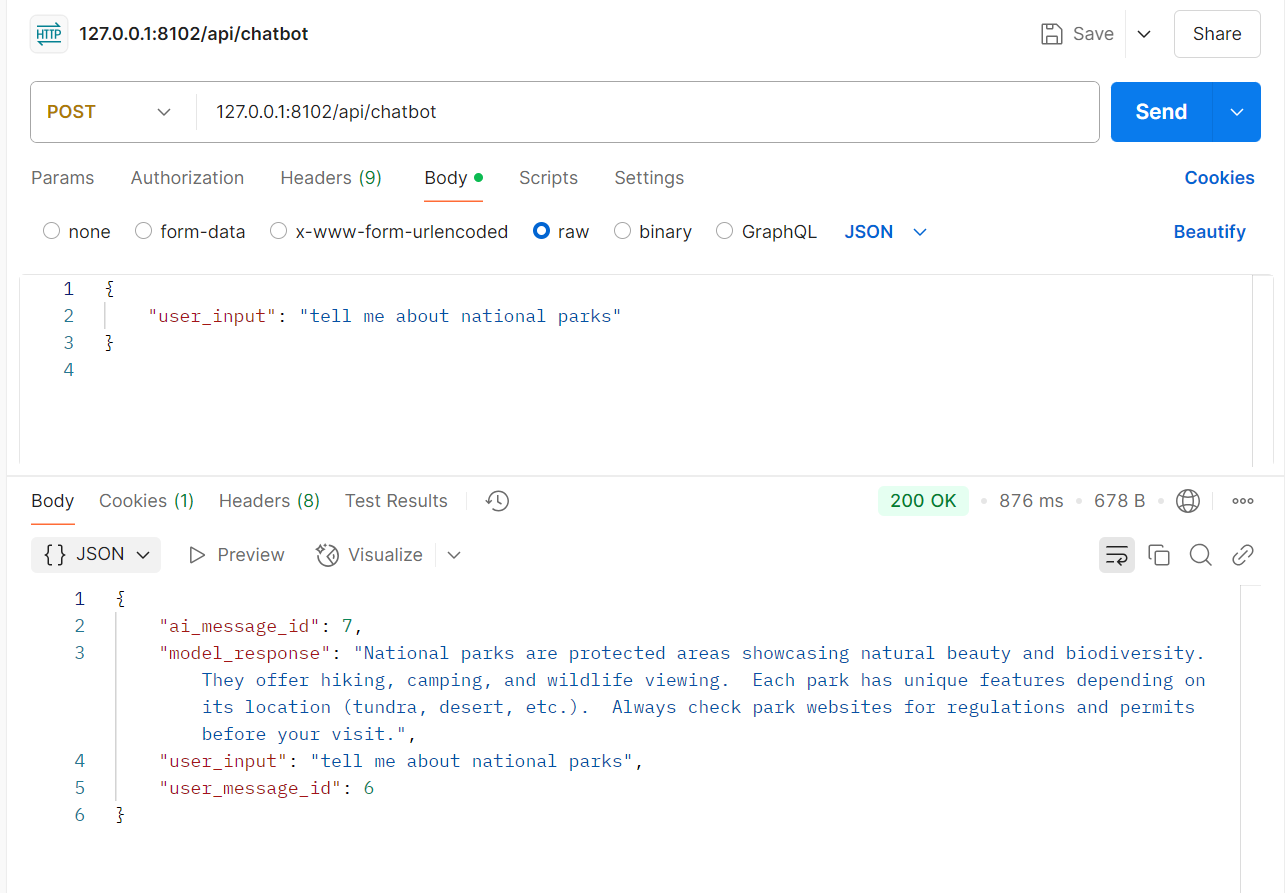
Before I was able to test my frontend and backend connection, I tested using Postman.
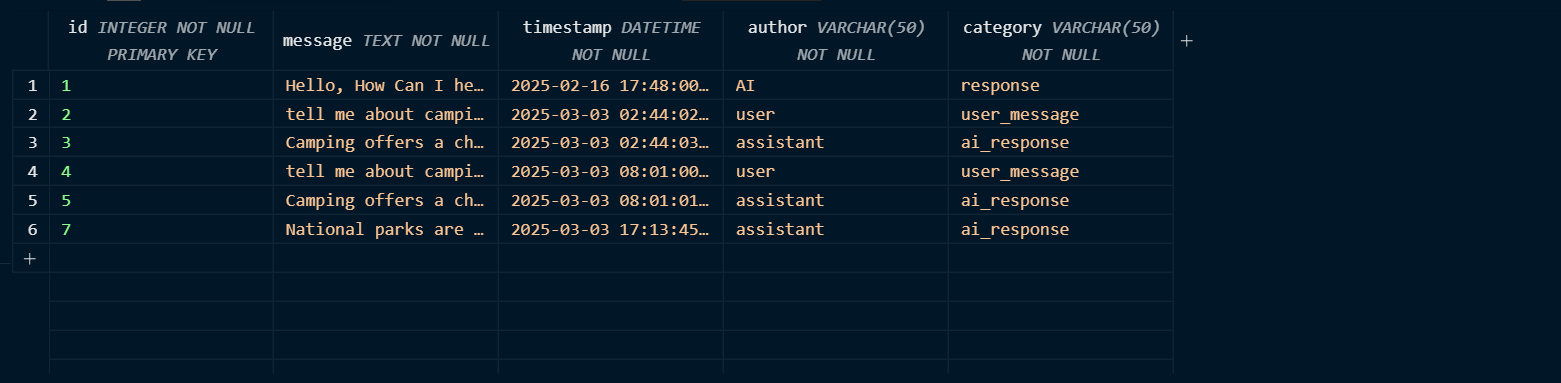
in this image you can see the user message and AI response along with the corresponding message IDs.

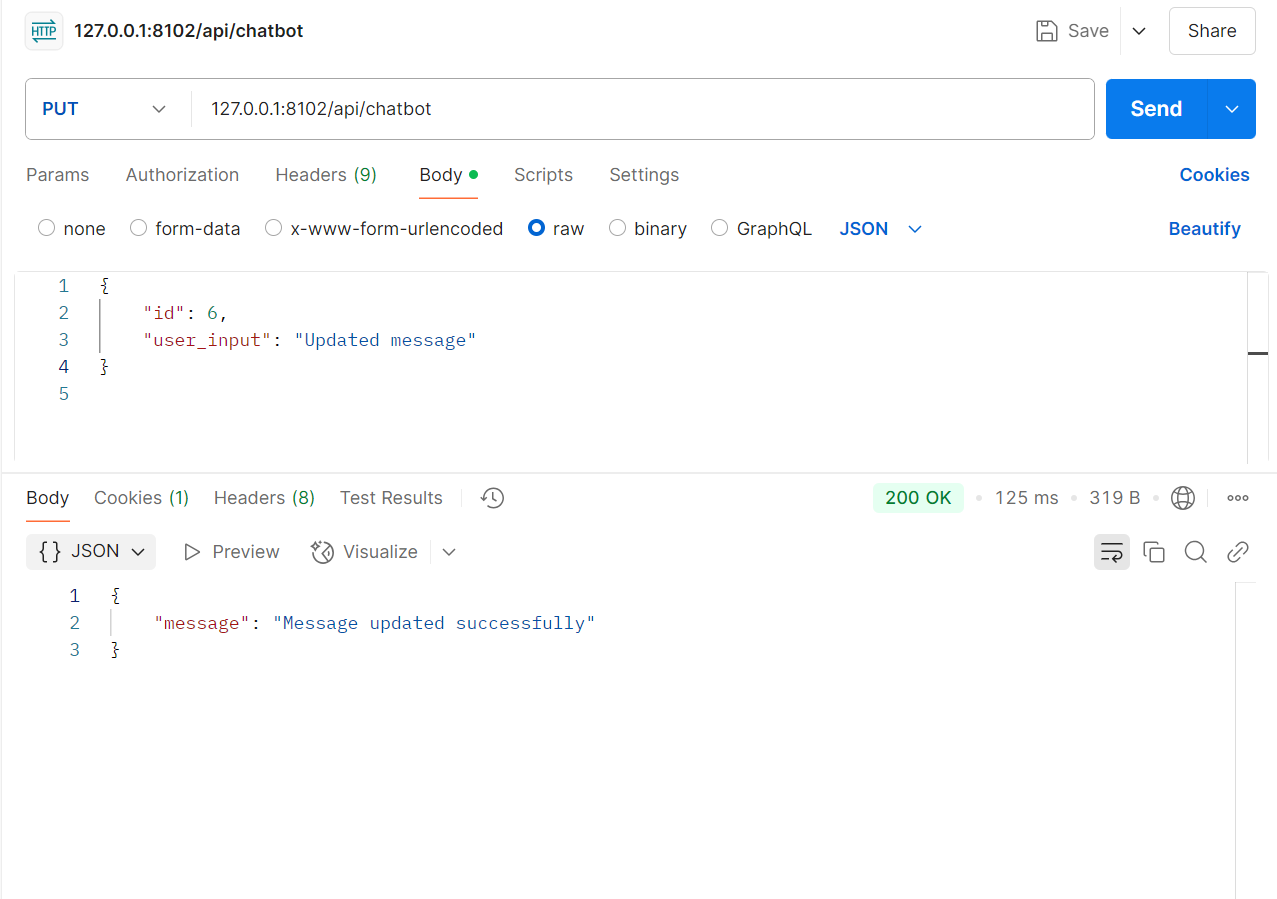
in this image you can see that my message with the id of 6 has been updated
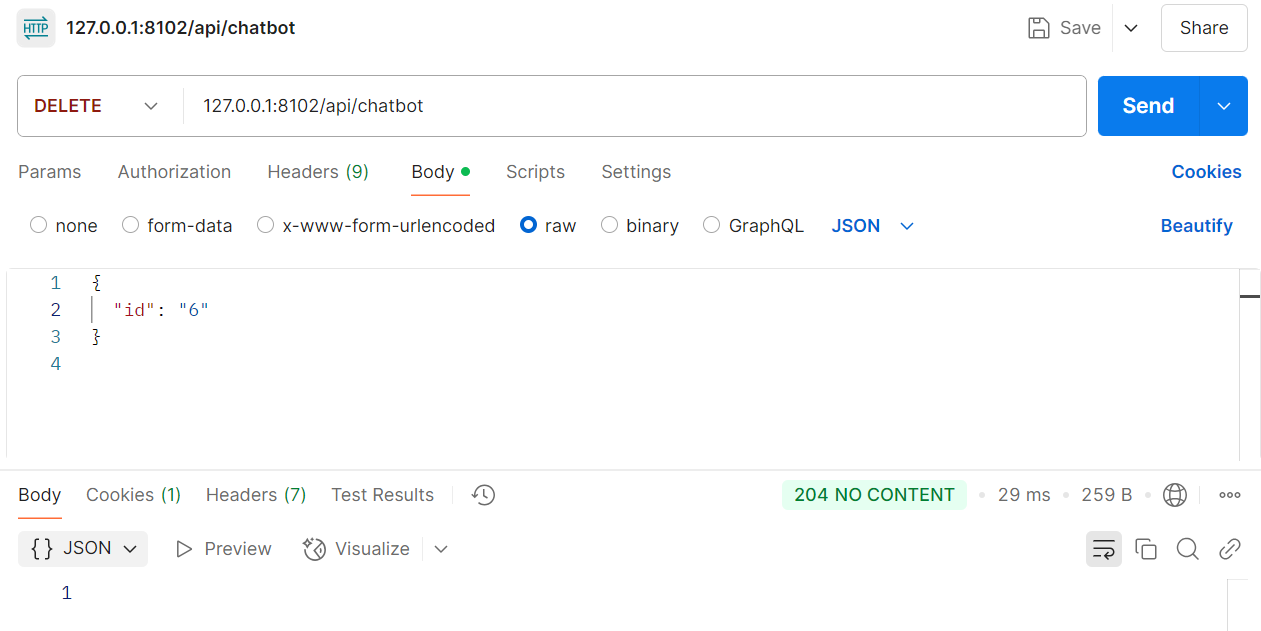
in this image, id 6 has been deleted
How Gemini AI meets College Board Requirements
| CPT Requirement | Code Snippet | Explanation |
|---|---|---|
| List Usage | python self.history.append({"role": role, "parts": [message]}) |
This code adds messages to a list (self.history) to keep track of the conversation. |
| Student-Developed Procedure | python def generate_ai_response(self, user_input): |
This function takes user input, and will return an AI-Generated response. This also applies to the purpose of helping camping enthusiasts learn more about camping and national parks. |
| Algorithm (Sequencing, Selection, Iteration) | try:data = request.get_json() if not data: return jsonify({"error": "Invalid JSON"}), 400 |
This is selection as the code checks if the JSON data is provided, and if it isn’t then it will return an error. |
| Procedure Call | python response_text = self.generate_ai_response(user_input) |
Calls the generate_ai_response() method to get the chatbot’s reply based on the user’s input. |
| Output Statement | python return jsonify({ "model_response": response_text }) |
Sends the AI’s response back to the user in a JSON format as the output of the API. |
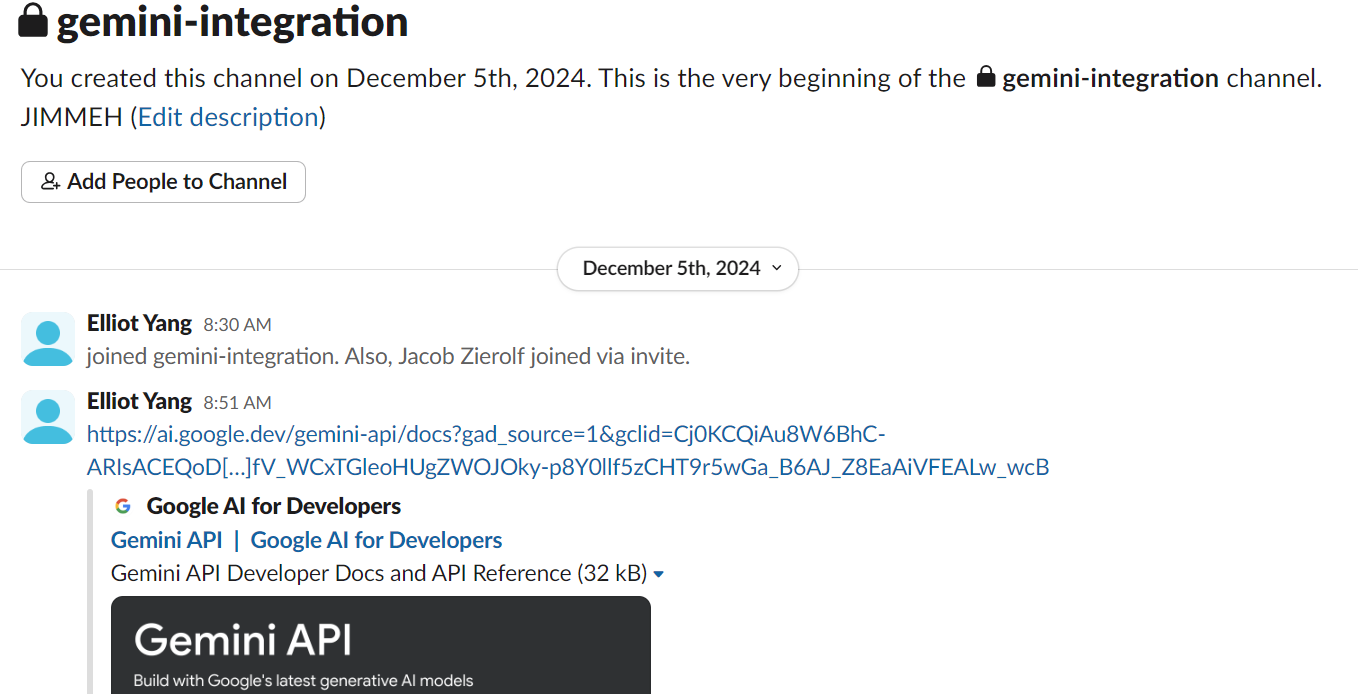
Working with Others with the Gemini Channel in Slack
One highlight of this experience was creating a collaborative Gemini group chat. Because I am lacking in experience and general knowledge of coding, I collaborated with other people with similar features in order to boost my learning and also aid others in similar situations as me. I created a channel in slack and sent messages to public channels to invite more people to join. This allowed me to realize that I can use all the resources I have available in order to accomplish something, and I have learned how important and impactful, but also how accessible collaboration is.
One of my most frequent collaborators were Yash. Some people were part of this chat but didn’t share or ask for help. I think that if I were to create one of these chats again, I would try to meet with others at least twice a month in order to peer review our functionality.
Final Working Project
Some problems that I had were that my fetch was only working on local. To fix this, I used python URI.